* Click on titles below to view individual sections of the video
Click Here To Learn More Contact A Sales Rep
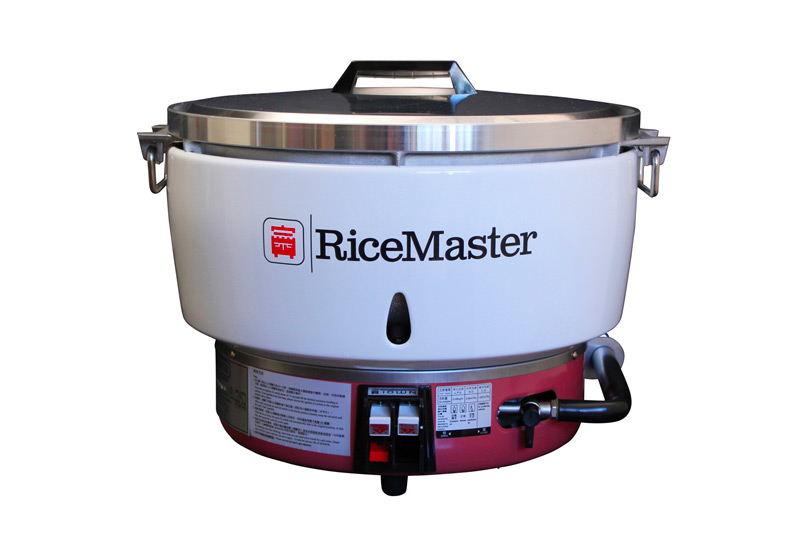
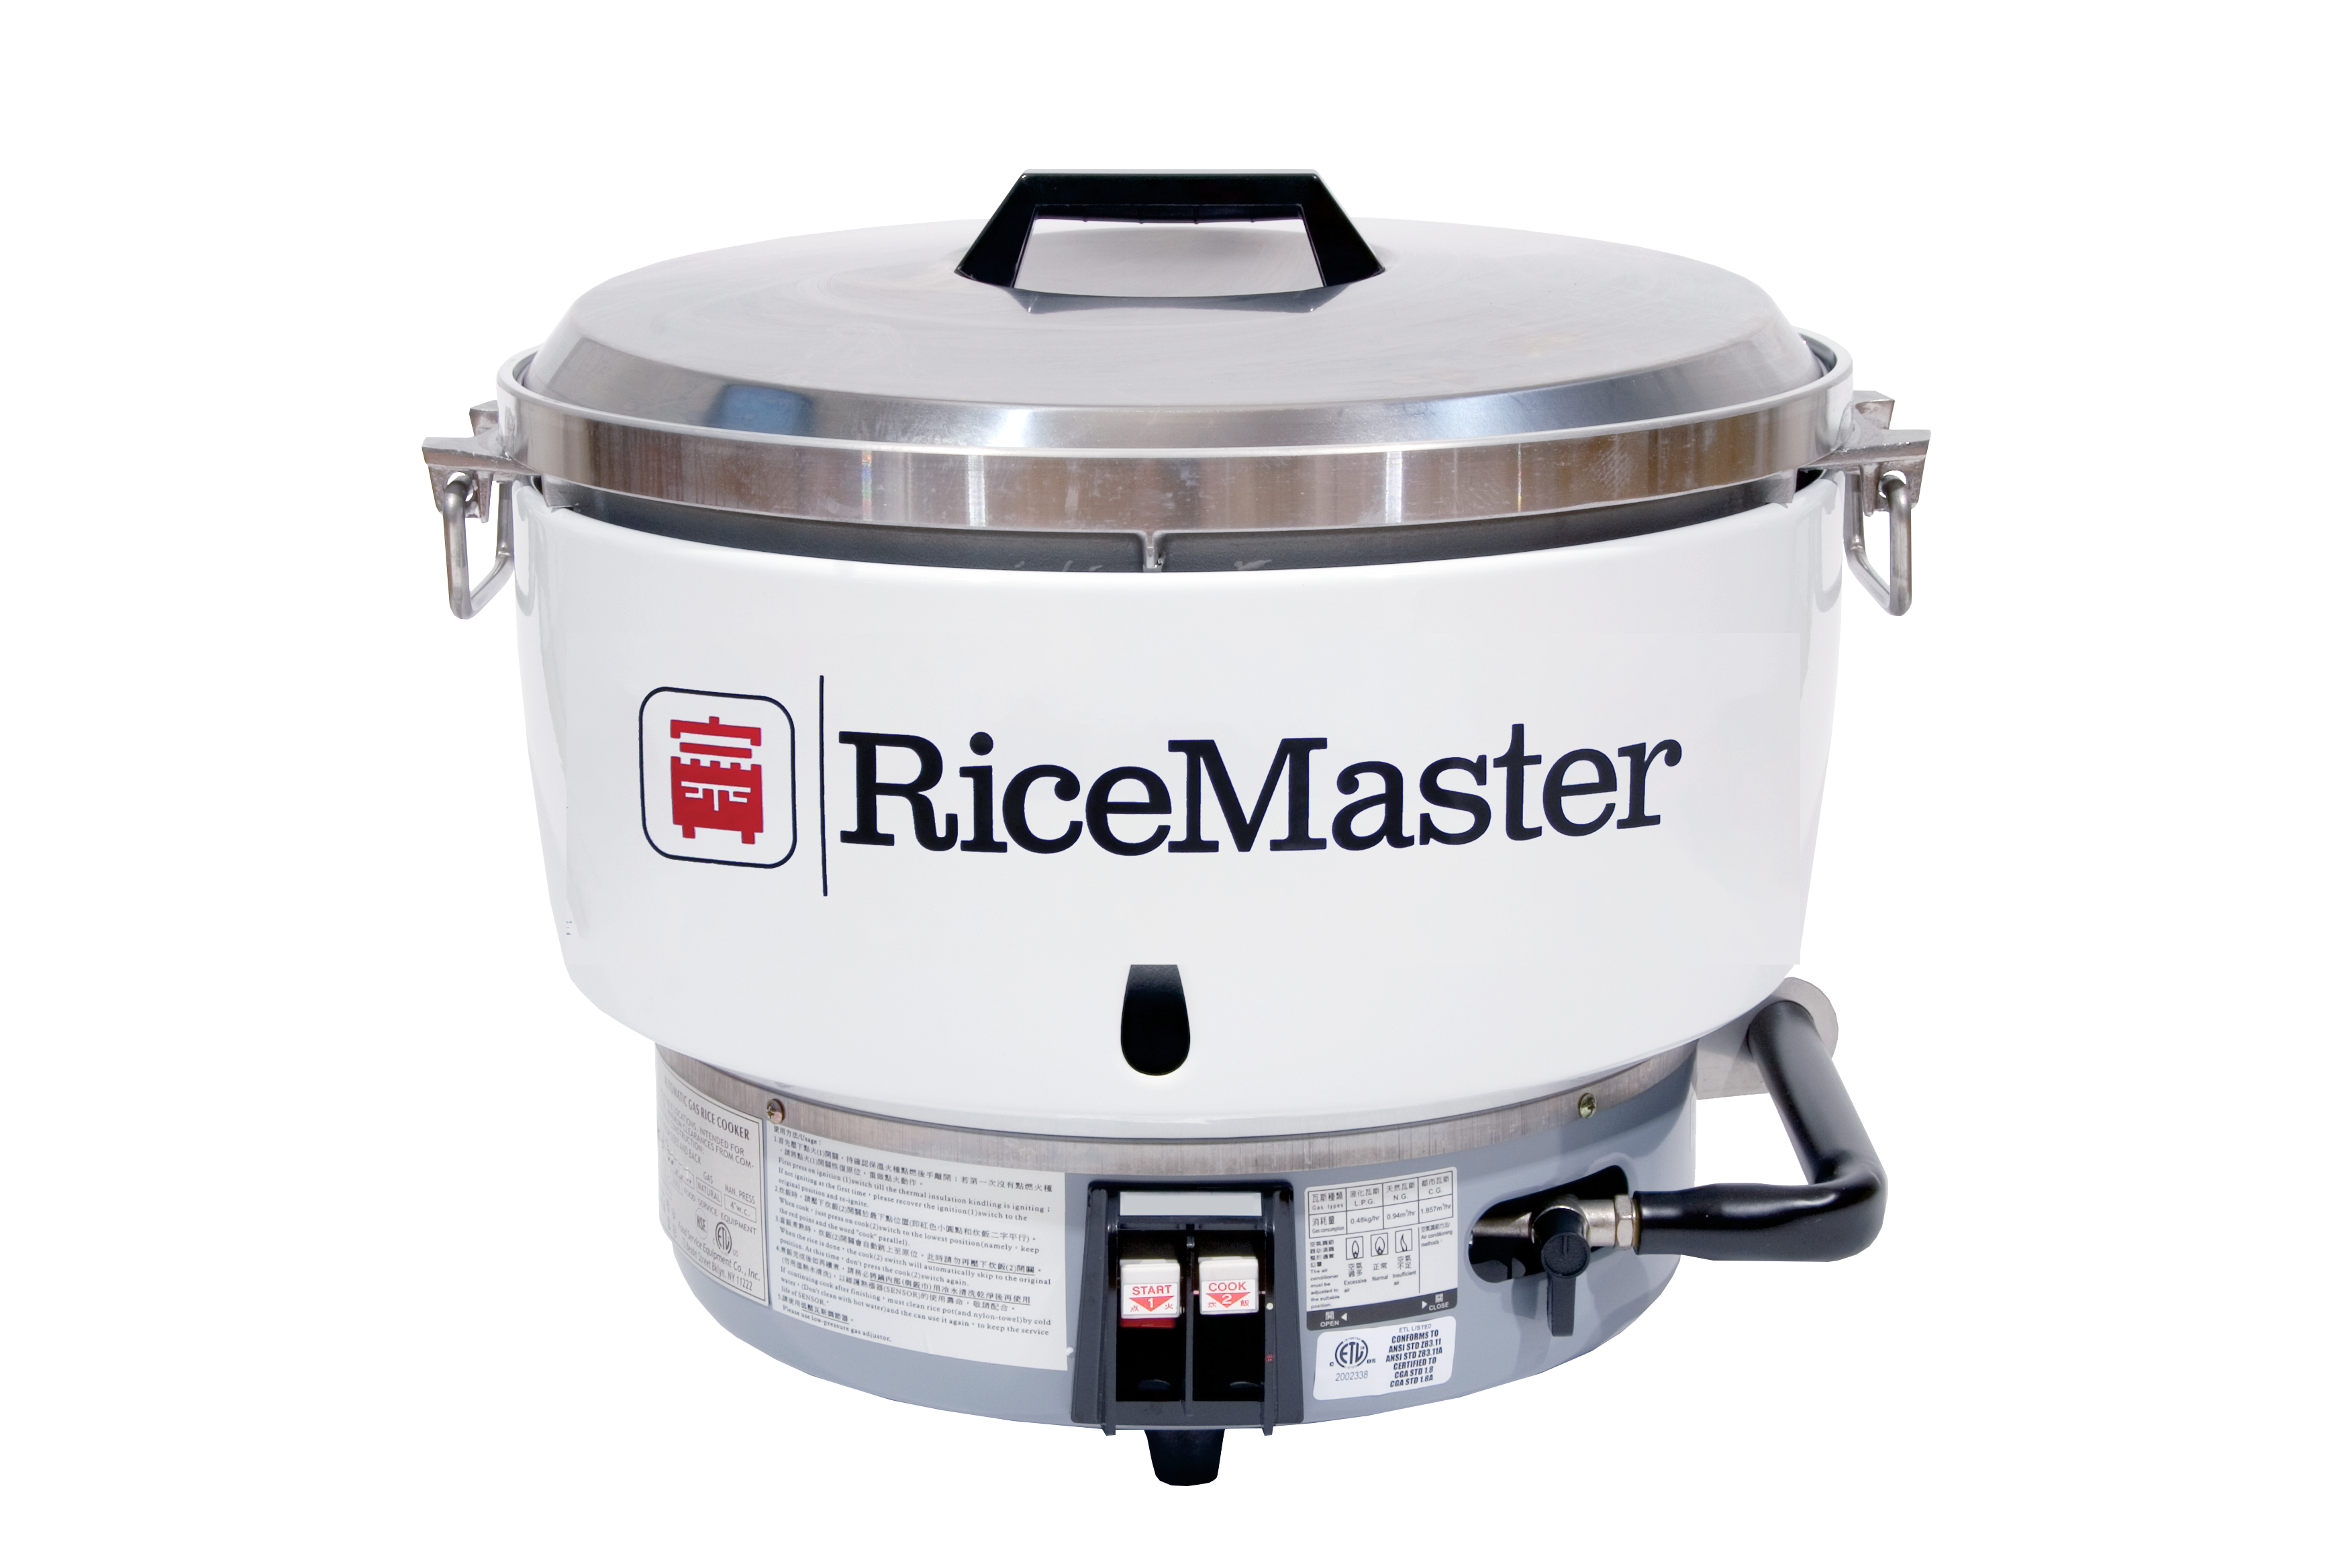
It’s critical to know that this is a gas appliance, it’s made for the cooking line, and must be under a hood. Now, at this point, let me explain to you some of the features, and the benefits, of your gas rice cooker. It comes with a regulator, that must be installed on the outside of the unit. This is a six-inch water column regulator and, the unit should only be installed by a certified gas plumber.
This is the base, which houses the pilot light, the burner system and many small parts, that make up for the operation in the unit. There is a stainless steel cover, which keeps debris from falling into the inner workings. In case you want this to be cleaned in the dishwasher, it’s very simple. It has three screws: one, two, three – and it can easily be unscrewed, and placed in the dishwasher. However, please remember, that if you should remove this portion of the base, it needs to be seated exactly correctly. If it’s out-of-balance, it will cause the rest of the unit to be out-of-balance, and it won’t cook the rice properly.
The base unit – on top of the base – is what we call the shroud, and this is easily removable unto itself. As you can see here, you line up the holes, and you give a clockwise turn, and it locks in place. When you want to clean it, give it a twist, counter-clockwise, lift that up, and it goes right into the dishwasher. This is an excellent feature for cleaning purposes.
Inside the shroud is the cast aluminum rice pot. This is where your rice is going to go, and it sits right there. Now, if it should be askew, or sitting unevenly, you might want to check the assembly – to make sure that the stainless steel cover on the base is sitting correctly, and the shroud is sitting correctly. Now that the rice pot is in place, we are about ready to start the operation.
Your certified gas plumbers should check for leaks, to make sure the system is going to operate correctly. At this point, I’d like to show you the stainless steel cover, which goes on top, and prevents some spillage, overflow. It also keeps the steam in the pot, to help you cook the rice.
We’re ready to cook. Once everything has been installed, we’re ready to turn on the gas valve, right here, which will allow the gas to flow into the system. Once that’s done, we have two buttons here. The number one button, which ignites the pilot light, and the number two button, which will ignite the burner from the pilot light. To ignite the pilot light, (this might take more than one try, might be even two tries) we need to press it, and look through the window, to make sure there indeed is a pilot light. If not, we lift up this red button and try again.
It’s very important that you understand that the number two button never gets depressed, unless we have a pilot light. So again, we have to try that again. The number one button gets depressed and we look for that pilot. Once the pilot is on, through that little window, we are now ready to ignite the burner from the pilot, and now the system is operating properly. It will take an average pot of rice about 18-30 minutes to cook, depending on the recipe, and the type of rice that you use. It’s also important to remember that once the rice is cooked, and this number two button pops up, that the rice cures for another ten to fifteen minutes, so that the remaining moisture is evaporated.
Now, let’s do some in-house troubleshooting. There might be a situation down the road where the unit is shutting off prematurely, and not cooking the rice. Typically, that’s the stem assembly.
Located in the center of the machine, the stem assembly can easily be changed, by the use of a Phillips screwdriver. Remove the two screws, remove the stem, and place in another stem.
There might be another situation where, conversely, the unit is burning the rice, and that’s typically attributed to the sensor, this bimetallic sensor.
The way to change the sensor is by turning the rice pot upside-down, having a flat-tip butter knife, or a flat-tip screwdriver, locating the indentation points of this horseshoe retaining clip, and popping out this clip, and keeping your hands over it, so the clip doesn’t fly away. The clip has some spring action to it. You pop out the old clip, and the sensor. You might want to clean that off, dry it off.
Sometimes, if it gets greased and fouled, it has a problem reading. Now, you’re ready to apply a new sensor. You put the new one here, squeezing that clip, finding those indentation points, and pushing that right back in with a screwdriver. Now, if the case is that you’re going through a lot of these sensors here, and that you are constantly having to change them, it might be an issue of how you’re cleaning the unit.
It’s important that you want to remove the sensor while you have this in the dishwashing section, and making sure it’s clean, dry and free of grease. The sensor needs to be free of debris, so it can read the temperature properly.